PahaSapaTrails.com is working on a mobile (iPhone/Android) trail mapping application for the Black Hills area and one of the chief considerations is making it work offline. As any local can tell you, cellular service can be spotty in the Hills, even in town in some cases! The plan is to let folks optionally download the map data/tiles directly to their device using the MBTiles format.
So you need to create your own aerial imagery tiles for a web slippy map project do you? Before you dive too far down this rabbit hole, take a look at the MapQuest Open Aerial tiles, they are available for use under very liberal terms and are good quality. I was only unable to use them for this project because not all tiles were available at all zoom levels that I needed for my area.
Getting and processing the data
Almost every year the NAIP (National Agriculture Imagery Program) captures imagery of most of the country during the growing season. This high quality aerial imagery of the United States (the same imagery used by Google and other web mapping providers) is available for free download from the USDA Geospatial Data Gateway. It may be available for order in other formats, but the only option available for download in my area is an ESRI Shapefile / MrSID format. The MrSID format is a typically lossy image format designed for very high resolution imagery. Unfortunately I have not found many good inexpensive tools for working with MrSID files, so the first step in this process is converting to a format that is easier to deal with in terms of software support, in this case GeoTIFF. The GeoExpress Command Line Utilities published by LizardTech, available for free download at the time of this writing, are able to do this extraction for us with the following command:
mrsidgeodecode -wf -i Crook_2012/ortho_1-1_1n_s_wy011_2012_1.sid -o Crook_2012.tiff
In this example I am using imagery for Crook County, Wyoming. The -wf (world format) option to mrsidgeodecode seems to be important, it tells it to create a geo-referenced tiff file.
Now that we have our imagery in the GeoTIFF format we can use the open source GDAL/OGR command-line utilities to slice and dice the data. The following commands used from here on out: nearblack, ogrinfo, gdalwarp and gdaladdo all ship with the GDAL/OGR libraries.
The next hurdle is that this raster imagery always has a border of not-quite-black pixels that need to be pared off somehow prior to being able to use multiple adjacent images (counties in my case). If your target tiles exist within one county (or one MrSID file as downloaded from the USDA gateway) then you probably do not need to worry about this.
nearblack -nb 5 -setalpha -of GTiff -o Crook_2012_NB.tiff Crook_2012.tiff
The -nb 5 option in effect tells nearblack how aggressive to be, this seemed to work for me but your mileage may vary.
After trimming the edges we need to warp the GeoTIFF to our target projection. Basically all web mapping uses the same projection, EPSG:3857. In my instance I am creating tiles with TileMill and their documentation specifies that GeoTIFF’s should be in this projection. The only trick here is that you must supply the source projection, the GeoTIFF contains coordinate information but it lost its projection along the way. Use the ogrinfo utility to first get a list of layers available in the shapefile you downloaded from the USDA.
ogrinfo Crook_2012/ortho_1-1_1n_s_wy011_2012_1.shp
INFO: Open of `Crook_2012/ortho_1-1_1n_s_wy011_2012_1.shp'
      using driver `ESRI Shapefile' successful.
1: ortho_1-1_1n_s_wy011_2012_1 (Polygon)
Then, you will need to get the information about that layer to find the original projection.
ogrinfo Crook_2012/ortho_1-1_1n_s_wy011_2012_1.shp ortho_1-1_1n_s_wy011_2012_1
INFO: Open of `Crook_2012/ortho_1-1_1n_s_wy011_2012_1.shp'
      using driver `ESRI Shapefile' successful.

Layer name: ortho_1-1_1n_s_wy011_2012_1
Geometry: Polygon
Feature Count: 12
Extent: (489299.300000, 4885056.470000) - (580705.680000, 4990601.000000)
Layer SRS WKT:
PROJCS["NAD_1983_UTM_Zone_13N",
    GEOGCS["GCS_North_American_1983",
        DATUM["North_American_Datum_1983",
...
In this case it is “NAD_1983_UTM_Zone_13N”, you may have to Google around to find the corresponding EPSG number, in this case it is EPSG:26913. After all that, we can warp the GeoTIFF. The –config and -wm options here speed up gdalwarp by letting it use more RAM, you may want to play with these a bit to figure out what is fastest for you.
gdalwarp --config GDAL_CACHEMAX 300 -wm 300 -s_srs EPSG:26913 -t_srs EPSG:3857 -r bilinear -of GTiff -co TILED=yes Crook_2012_NB.tiff Crook_2012_NB_GoogleMercator.tiff
A person could at this point use gdal to merge multiple GeoTIFF’s together (if applicable) and then use the gdal2tiles script to generate tiles directly. In my case, my workflow already involves creating tiles with TileMill, so I opted for that route.
This next step is optional in theory but necessary in practice if you want to be able to preview the tiff files in TileMill or other imaging software. What this does is add smaller versions of the GeoTIFF to itself for lower zoom levels.
gdaladdo --config GDAL_CACHEMAX 300 -r cubic Crook_2012_NB_GoogleMercator.tiff 2 4 8 16 32 64 128 256
Creating tiles
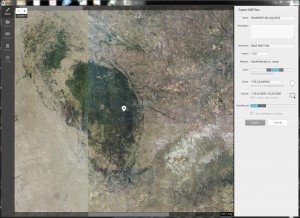
After all of that is done you can load all of your GeoTIFF’s up into TileMill and see how they look. I give each TileMill layer a class called “geotiff” and use the following style.
.geotiff
{
  raster-opacity: 1;
  raster-scaling: lanczos; /* Best quality but slowest */
}
You can then export tiles using the standard TileMill process.
There are always of course extra considerations, such as output image size/quality. When generating map tiles of roadways and the like very often the PNG format is the best choice, but for our aerial imagery we want to use JPEG. Following are two tiles at 3 different quality / compression levels. From left to right, 65%, 75%, 85%.
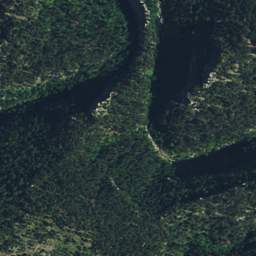
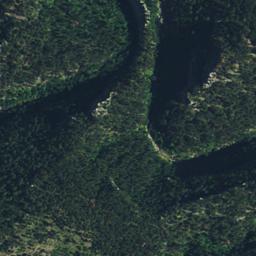
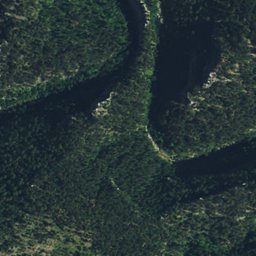
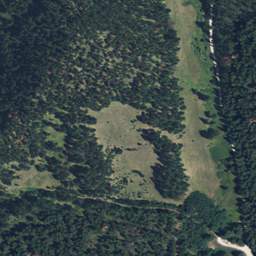
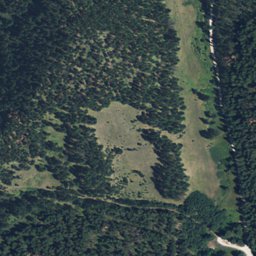
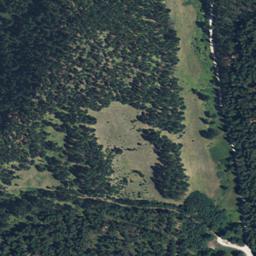
Here is what the resulting file size was for the entire area at each of the three quality levels.
3570838528 Mar  7 15:55 aerial_65.mbtiles
4288478208 Mar  6 18:00 aerial_75.mbtiles
5750595584 Mar  6 05:42 aerial_85.mbtiles
Other considerations / Future improvements
Going through this process absolutely explodes the file size. The original NAIP imagery files for my working area are 33,743,711,602 bytes, or a little over 30GB. After converting to GeoTIFF and doing the processing mentioned above, the resulting size of the tiff’s is 952,212,023,220 bytes (closing in on 1TB). One way to greatly reduce this would be to use the JPEG-in-TIFF options that gdal provides.
My biggest complaint with where I am at with this now is that not all of the images are uniform with respect to color, brightness and contrast. gdal provides some options that could be used to adjust these from the command-line, but it would be a very manual process and may take a long time if many iterations are required. I may look at adding some image filters to mapnik (the mapping engine under TileMill) to enable specifying some simple Photoshop-style corrections.